
Best practices and lessons learned from the classroom.
Keeping the attention of 30 students is a challenge in any classroom. In a teaching laboratory, each new day can feel like its own unpredictable experiment, but it doesn’t have to be that way. Laboratory instruction and classroom management can be improved when lab layouts and classroom designs are optimized. Consider the following five design concepts for teaching lab success.
1. Don’t block circulation.
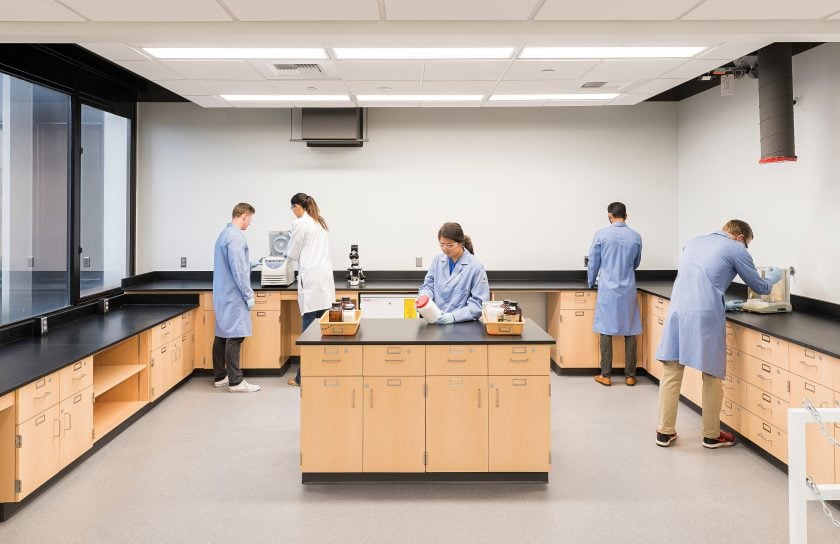
The laboratory instructor needs to be able to move easily and freely around the room, interacting with students and intercepting potential problems. A common laboratory feature is the use of long, peninsula-like tables attached to the perimeter of the room with students on either side. This creates a single circulation path in the center of the room, making it difficult to reach students in the dead ends of the peninsulas.
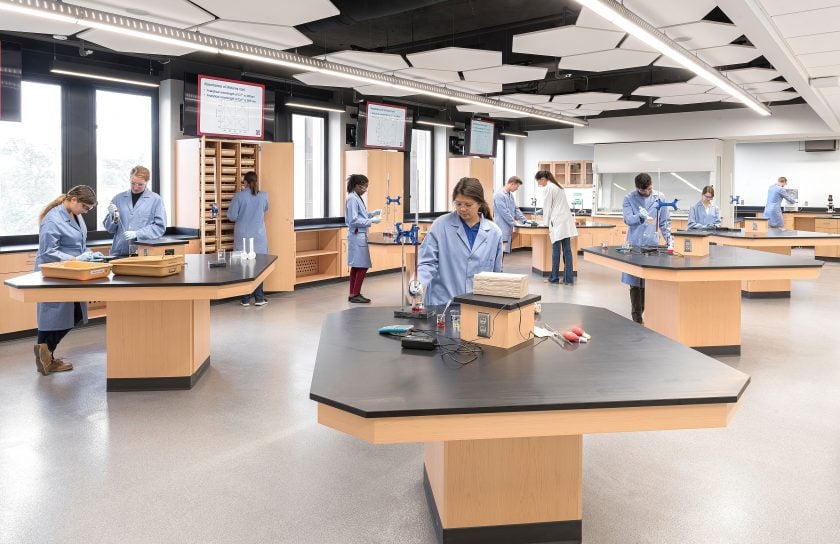
Best practice: Design laboratories with four-sided workstations and circulation on all sides, spaced 5 feet apart, around the room. A square-, diamond- or D-shaped workstation allows the instructor to access all students, regardless of where they’re located. This layout also creates multiple circulation paths for easy maneuvering. Keeping 5 feet of circulation between each workstation is a best practice that allows ample room to circulate freely while students work back-to-back at their workstations.
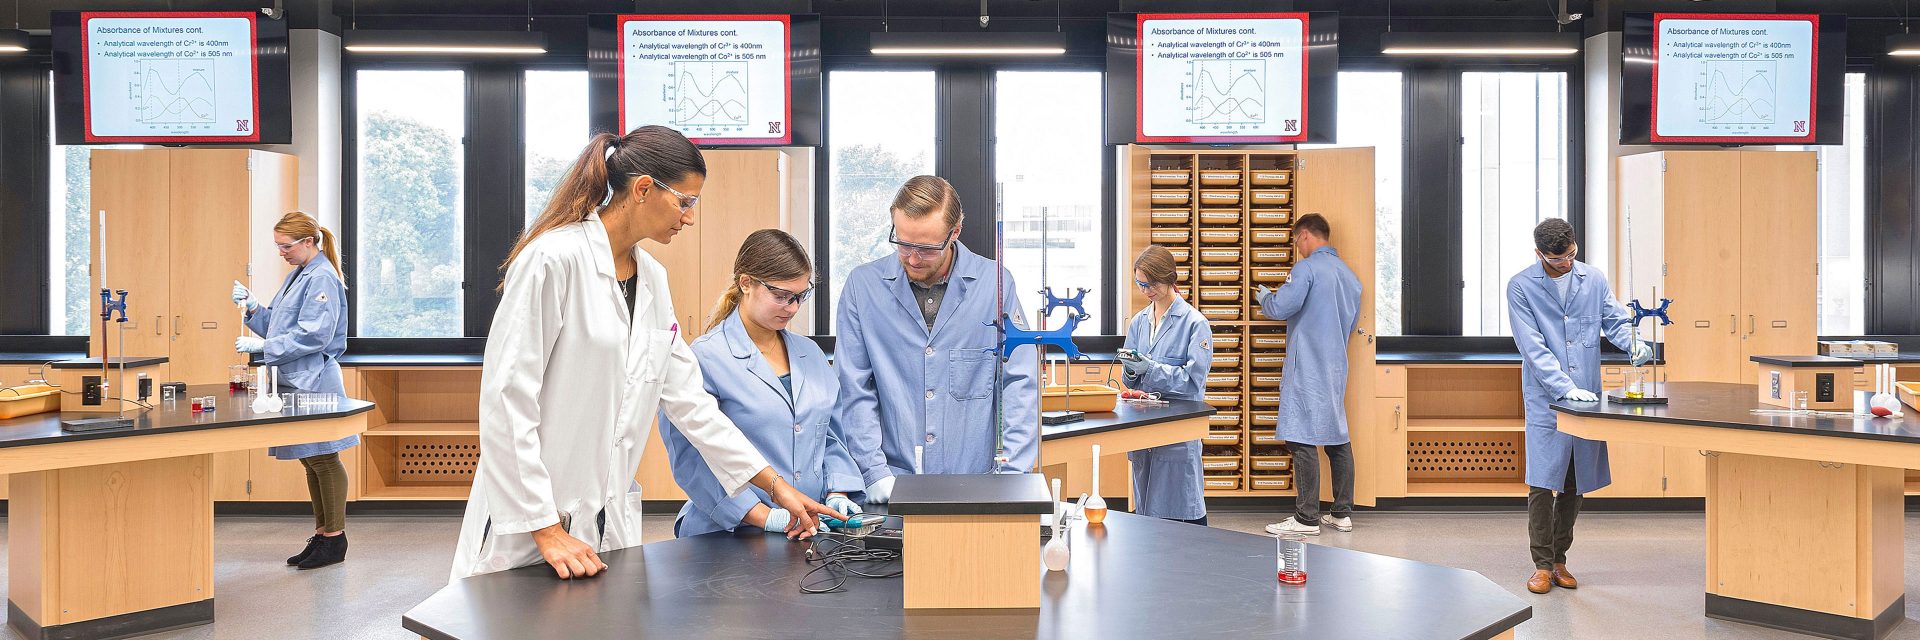
Case in point. When designing the University of Nebraska-Lincoln’s Hamilton Hall Chemistry Laboratory, CRB specified diamond-shaped workstations, spaced out enough for instructors and students alike to circulate easily. The diamond-shaped tables, spaced proportionally across the laboratory, eliminated bottlenecks and promoted optimal movement.
2. Maintain clear lines of sight.
Instructors must be able to observe students easily from any point in the room—and vice versa. In the STEM lab, the success and safety of an experiment is dependent upon proper procedures. Therefore, observing exactly what and how the instructor is conducting an experiment or demonstrating a procedure is critical to learning proper technique and process. When working with infectious biohazards, for example, one wrong hand movement can result in a breach of protocol and start the spread of infection.
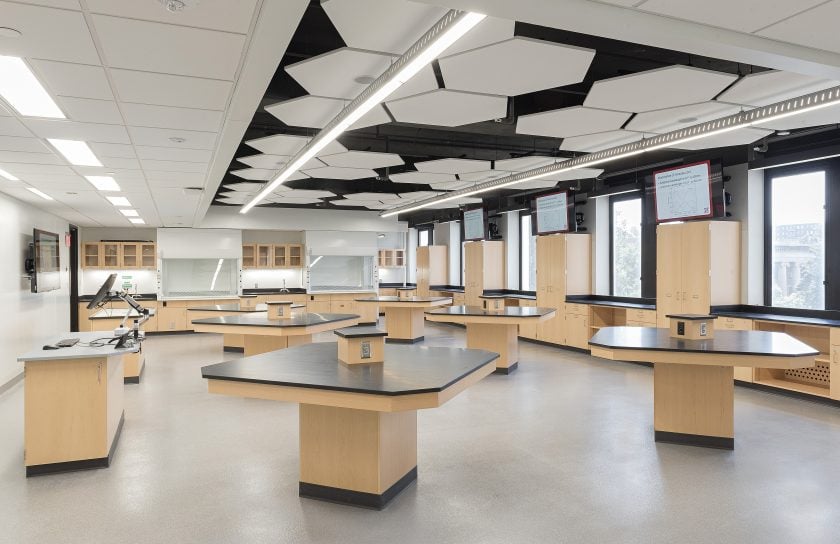
Best practice: Avoid the use of alcoves and/or shelving above benches that block lines of sight in the laboratory. Overhead shelving should be reserved for research, not teaching labs, and the perimeter of the space.
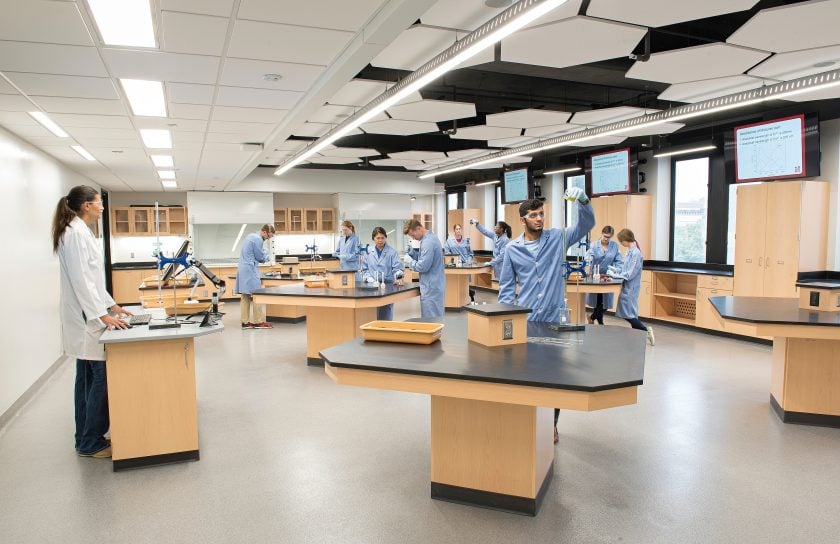
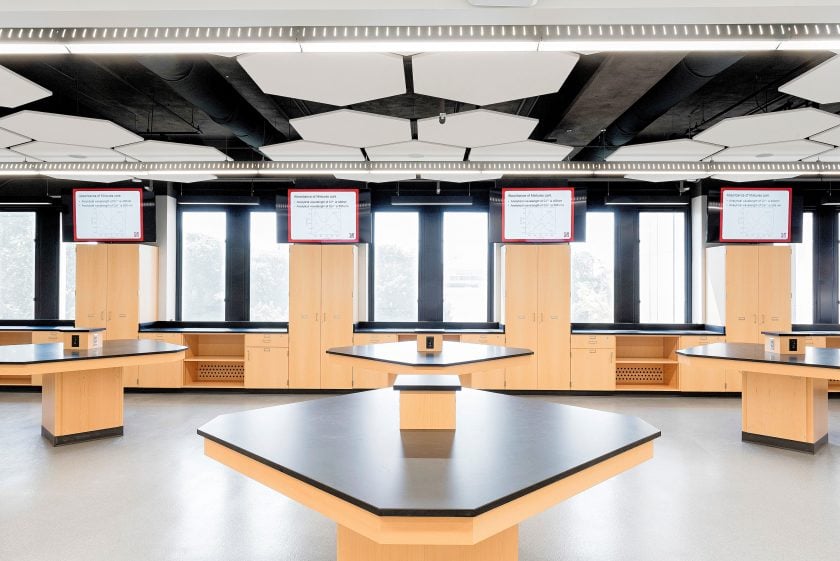
Case in point. Lines of sight are clear at Hamilton Hall, as storage is tucked out of the way, attached to the perimeter of the laboratory, and nothing but lighting is hanging from the ceiling. With six diamond pods evenly spaced throughout the room, the focus for all is on the experiment at hand.
3. Provide adequate demonstration views for all.
In traditional classrooms—laboratory and otherwise—an instructor stands at the front of the classroom and demonstrates class work, but only those in front can see clearly. This often leads to disengaged students who don’t retain the information being taught.
Best practice: In the 21st-century laboratory, this can be avoided by leveraging digital technology. Use a mobile camera to project the instructor’s instruction and actions on classroom monitors for everyone to see. Students that can see what the instructor is doing and will have all the tools necessary to do the experiment correctly.
Case in point: At Hamilton Hall, CRB planned for six display monitors dispersed throughout the room. A camera in the front at the instructor’s demonstration table picks up the instructor’s fine hand movements, projecting instruction around the room. This levels the playing field for all students regardless of their pod/table location; students located far away from the instructor have front row seats like everyone else.
4. Equipment needs clearance.
In many science courses, laboratory classes will often feature a different piece of advanced lab equipment that needs to be carefully explained and demonstrated by the instructor. Pieces of equipment are often spread throughout the perimeter or corners of the classroom, intermixed with student location, making it hard for all students to gather around and clearly observe the instructor’s technical lesson.
Best practice: CRB recommends building an instrumentation center in the teaching lab for demonstrations of featured equipment. Ideal for maintaining lines of sight and adequate space for all students to gather around, an instrumentation center can be an alcove adjacent to the laboratory or a corner carved out of the classroom space.
Case in point. Hamilton Hall features an instrumentation center alcove, built on the side of teaching laboratory. With an island in the middle of the large rectangular demonstration area, the instrumentation center provides clear lines of sight, adequate gathering space for all students and the ability to circulate freely should students want a different view. In this classroom laboratory, instructors can teach from the designated equipment demonstration area or from the traditional lecture station at the main teaching wall of the classroom.
5. Don’t forget acoustics.
Let’s face it, laboratories are noisy. There are often many hard surfaces and a relatively large number of people packed into a teaching laboratory. Ambient noise from equipment, refrigerators, freezers, incubators and more only compound the problem, so when a instructor needs to instruct or make an important announcement, it is strenuous to constantly speak loudly to compensate for improper acoustics.
Best practice: Place loud equipment in adjacent laboratory support rooms, when possible, or tuck them away into alcoves designated for equipment. Specify finishes with acoustical properties for the laboratory, such as acoustical ceiling tile and resilient (e.g., rubber or vinyl) flooring. While they may seem desirable, exposed ceilings will only hinder laboratory acoustics by promoting sound reverberation. Resilient flooring will reduce footfall sounds and be softer underfoot.
Case in point. The Hamilton Hall ceiling features traditional acoustical ceiling tile over the instruction area, and hexagon-shaped acoustical ceiling tiles over the otherwise open ceiling hang low to further absorb ambient noise where students are working.
Putting it into practice
The challenge of teaching lab management and student compliance won’t disappear just because a laboratory was designed properly but implementing these principles can help avoid potential learning issues and ensure proper instruction is communicated to students throughout the classroom, regardless of location.
Instituting the five design concepts is ideal and easier to implement during new construction, but it is also possible to retrofit a teaching lab with many of these features—even one at a time. The properly designed 21st-century teaching laboratory will surely be a successful experiment.